Hey there! So you’ve found yourself with a dried sourdough starter that needs a little TLC. Don’t worry, we’ve got you covered.
Reviving a dried sourdough starter may seem intimidating, but with a few simple steps, you’ll have it back to its lively, bubbly self in no time. In this guide, we’ll walk you through the process of:
- Assessing the starter
- Gathering the necessary ingredients and tools
- Rehydrating the starter
- Feeding the starter with fresh flour and water
We’ll also cover how to maintain a feeding schedule, troubleshoot common issues, and gradually increase the starter’s volume. Before you know it, you’ll be baking delicious sourdough bread using your revived starter.
Key Takeaways
- Assess the appearance, texture, and smell of the dried starter before rehydration
- Choose the appropriate rehydration method based on the viability of the starter
- Establish a specific feeding schedule and adjust ratios based on the starter’s behavior
- Monitor the starter’s activity and growth by observing changes in volume, texture, and aroma after feeding
Assess the Dried Sourdough Starter
To assess the dried sourdough starter, you should examine its appearance, texture, and smell. These factors will help you determine the viability of the starter and the most effective rehydration method to bring it back to life.
Start by examining the appearance of the dried sourdough starter. It should have a powdery or flaky texture, with a pale or off-white color. Any discoloration or presence of mold indicates that the starter may not be viable and shouldn’t be used.
Next, assess the texture of the dried starter. It should crumble easily when touched, indicating that it has dried out completely. If it feels moist or sticky, it may have retained some moisture and can potentially be revived.
Lastly, evaluate the smell of the dried sourdough starter. It should have a slightly sour and fermented aroma, reminiscent of yeast and bread. If the starter smells rancid or foul, it’s likely no longer viable.
Once you have assessed the starter’s appearance, texture, and smell, you can determine the best rehydration method. If the starter appears viable, you can try rehydrating it by mixing it with warm water and flour. However, if the starter shows any signs of spoilage, it’s recommended to discard it and start with a fresh batch.

Gather the Necessary Ingredients and Tools
Now that you have assessed the dried sourdough starter, it’s time to gather the necessary ingredients and tools.
To revive your sourdough starter, you’ll need a few key ingredients. First and foremost, you’ll need flour. It’s recommended to use unbleached all-purpose flour or whole wheat flour for best results. You’ll also need water, preferably filtered or chlorine-free, as chlorine can inhibit the growth of the starter. Additionally, you’ll need a clean container with a lid for storing the starter during the revival process.
In terms of tools, you’ll need a kitchen scale to accurately measure the ingredients. Measuring by weight is crucial for maintaining the correct hydration level of the starter. A mixing bowl and a spoon or spatula for stirring the ingredients together are also necessary. It’s important to ensure that all tools and containers are clean and free from any traces of detergent or soap, as these can harm the starter.
Having the necessary ingredients and tools ready before starting the revival process will make the entire process smoother and more efficient.
Rehydrate the Dried Starter
To rehydrate the dried sourdough starter, you’ll need to add water to the mixture. This process is crucial to bring the dormant microorganisms back to life and revive your starter. Here are four rehydrate methods and sourdough revival tips to guide you through the process:
- Measure and Add Water: In a clean glass jar, measure out the desired amount of water according to your recipe. It’s important to use non-chlorinated water as chlorine can inhibit the growth of the beneficial bacteria in the starter.
- Gradually Add the Dried Starter: Slowly sprinkle the dried starter into the water while stirring continuously. This helps to evenly distribute the starter and prevent clumps from forming.
- Stir and Dissolve: Use a clean spoon or spatula to thoroughly mix the water and dried starter until the mixture is smooth and all the starter is dissolved. This step ensures that the microorganisms have access to the water they need to thrive.
- Cover and Wait: Once the mixture is well combined, cover the jar loosely with a clean cloth or plastic wrap. Allow the starter to rehydrate at room temperature for at least 24 hours, or as specified in your recipe. During this time, the microorganisms will become active and begin to ferment.
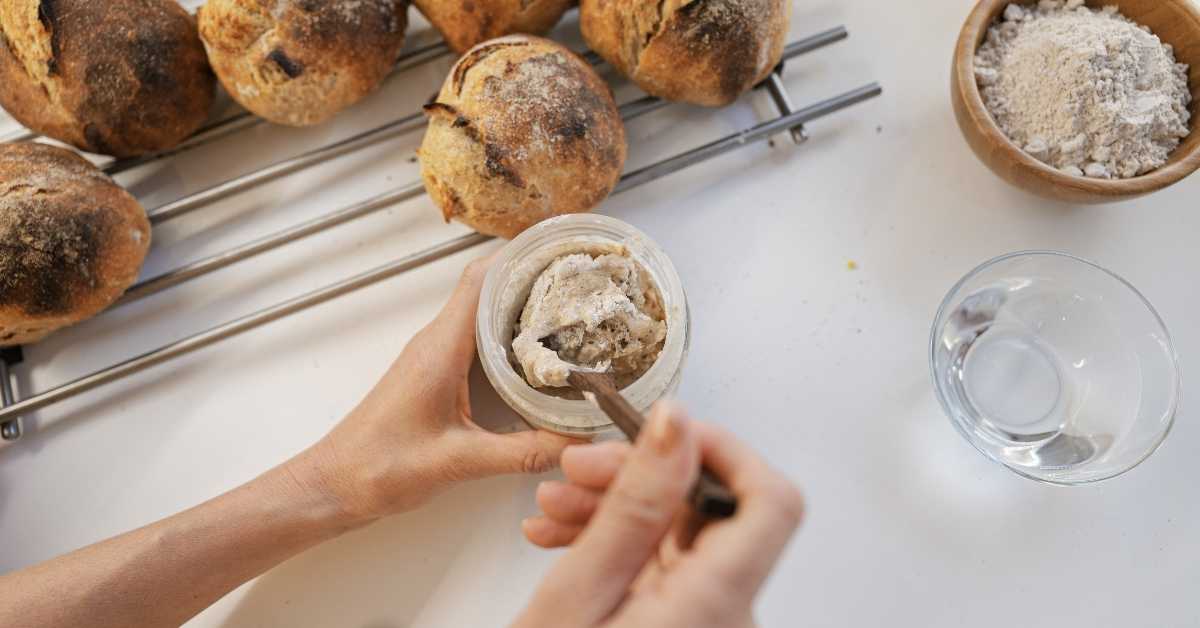
Feed the Starter With Fresh Flour and Water
Start by combining fresh flour and water to feed the dried sourdough starter. This step is crucial in reviving a neglected starter and bringing it back to life. The process involves providing the starter with the necessary nutrients to promote yeast and bacterial activity.
When it comes to choosing the flour, you have the option of using alternative flours. These include whole wheat flour, rye flour, or even a blend of different grains. Alternative flours can add unique flavors and textures to your sourdough bread.
To begin, take a clean container and add equal parts of flour and water to it. Stir well to ensure the mixture is smooth and free of lumps. Cover the container loosely and let it sit at room temperature for about 12 hours.
This feeding process should be repeated every day or every other day until you notice signs of activity, such as bubbles forming and a slightly sour smell. Remember to discard a portion of the starter before each feeding to avoid overgrowth and maintain a manageable quantity.
Maintain the Feeding Schedule
Keep up with the regular feeding schedule to ensure the health and vitality of your sourdough starter. Establishing a regular routine is essential for maintaining a strong and active starter. Here are some key points to keep in mind:
- Consistency is key: Stick to a specific time each day for feeding your starter. This helps establish a routine and allows the yeast and bacteria to thrive.
- Adjust feeding ratios: As your starter matures, you may need to adjust the feeding ratios to maintain its health. If your starter isn’t rising as expected, try increasing the amount of flour and water you feed it.
- Observe and adapt: Pay close attention to your starter’s behavior. If it becomes too sluggish or develops an off-putting smell, it may be a sign that adjustments to the feeding schedule or ratios are needed.
- Document and track: Keep a record of your feeding schedule and any adjustments you make. This will help you understand how your starter responds to different conditions and allow you to fine-tune your approach.
Monitor the Starter’s Activity and Growth
As you monitor the activity and growth of your sourdough starter, pay attention to its behavior and signs of fermentation. Understanding the starter’s fermentation process is crucial in reviving a dried sourdough starter successfully. Fermentation is the key process that gives sourdough its distinct flavor and texture.
To monitor the starter’s activity, observe changes in volume and texture. A healthy starter should increase in volume after feeding, indicating that the wild yeast and lactobacilli are active. Additionally, the surface of the starter should be bubbly and have a pleasant, slightly sour aroma. These signs indicate that fermentation is taking place.
Temperature control is essential during the fermentation process. Maintain a consistent temperature between 70-85°F (21-29°C) to encourage optimal yeast and bacterial growth. Lower temperatures may slow down fermentation, while higher temperatures can lead to excessive acid production and off-flavors.
To ensure proper temperature control, consider using a thermometer or a temperature-controlled environment. Keep the starter in a warm spot in your kitchen or use a proofing box with adjustable temperature settings. By providing the ideal temperature for fermentation, you can promote the growth of beneficial microorganisms and revive your sourdough starter successfully.
Troubleshoot Common Issues
If you’re experiencing issues with reviving your dried sourdough starter, you may occasionally encounter common troubleshooting problems. Don’t worry, though – these issues are often easily resolved with a few simple steps.
Here are some common mistakes and troubleshooting tips to help you get your sourdough starter back on track:
- Using chlorinated water: Chlorine in tap water can inhibit the growth of yeast and bacteria in your starter. Make sure to use filtered or bottled water to avoid this issue.
- Insufficient feeding: Your starter needs regular feeding to stay healthy and active. If you notice that your starter isn’t rising or has a foul smell, try increasing the frequency of feedings or adjusting the ratio of flour and water.
- Inconsistent temperature: Temperature plays a crucial role in the fermentation process. If your starter isn’t thriving, check if it’s being kept in an environment that’s too hot or too cold. Maintaining a consistent temperature can help promote fermentation.
- Lack of patience: Reviving a dried sourdough starter takes time and patience. It can take several days or even a couple of weeks for your starter to fully recover. Be patient and continue with regular feedings, and you’ll eventually see the desired results.
Gradually Increase the Starter’s Volume
To gradually increase the volume of your dried sourdough starter, you’ll want to begin by feeding it with equal parts of flour and water. This process won’t only revive your starter but also increase its hydration level. Increasing the hydration of your starter is essential for its growth and development.
When feeding your dried starter, make sure to use room temperature water and flour. The water should be chlorine-free, as chlorine can inhibit the growth of the yeast and bacteria in the starter. Mixing equal parts of flour and water will provide enough food for the dormant microorganisms to begin multiplying.
After feeding your starter, it’s crucial to maintain proper temperature control. The ideal temperature range for sourdough fermentation is between 75°F (24°C) and 85°F (29°C). At lower temperatures, the fermentation process will be slower, while higher temperatures can lead to excessive yeast activity and a sour taste. You can use a thermometer to monitor the temperature and make adjustments as needed.
Start Using the Revived Sourdough Starter for Baking
Now that your dried sourdough starter has been revived, it’s time to put it to use for baking. Here are some tips on using the revived starter for different recipes and troubleshooting common baking issues:
- Experiment with different recipes: Your revived sourdough starter can be used in a variety of recipes, such as bread, pancakes, waffles, and even pizza dough. Each recipe may require slight adjustments in terms of hydration, fermentation time, and temperature. Feel free to explore and find the perfect recipe that suits your taste.
- Understand the fermentation process: Sourdough baking is all about harnessing the power of wild yeast and bacteria. Proper fermentation is crucial for a successful bake. Make sure to allow your dough to rise adequately, following the recipe’s instructions. This will ensure proper flavor development and a light, airy texture.
- Troubleshoot common baking issues: If you encounter problems like a dense crumb, lack of rise, or excessive sourness, there are several troubleshooting techniques to consider. Adjusting the hydration level, using warmer water, or increasing the proofing time can help improve the texture and rise of your bread. Additionally, adjusting the feeding schedule and maintaining a consistent temperature during fermentation can help control the sourness level.
- Practice and patience: Sourdough baking is a skill that requires practice and patience. Don’t get discouraged if your first few bakes don’t turn out as expected. Keep experimenting, adjusting, and learning from your mistakes. With time, you’ll develop a deep understanding of your revived starter and achieve consistently delicious results.
Frequently Asked Questions
Can I Use Whole Wheat Flour Instead of All-Purpose Flour to Rehydrate the Dried Sourdough Starter?
You can use whole wheat flour instead of all-purpose flour to rehydrate the dried sourdough starter. Whole wheat flour adds more nutrients and flavor. Remember to use filtered water, as it helps revive the starter by removing chlorine and other impurities.
How Long Does It Typically Take for a Dried Sourdough Starter to Show Signs of Activity After Rehydration?
It typically takes a dried sourdough starter a few days to show signs of activity after rehydration. If you’re not seeing any signs, troubleshoot by adjusting the temperature, feeding schedule, or hydration level.
Can I Use Tap Water Instead of Filtered Water to Feed the Revived Sourdough Starter?
You can use tap water instead of filtered water to feed the revived sourdough starter. However, keep in mind that tap water may contain chlorine or other impurities that could affect the fermentation process. Using filtered water is recommended for optimal results.
Is It Normal for the Rehydrated Sourdough Starter to Have a Strong Odor?
It is normal for rehydrated sourdough starters to have strong odors. Common causes include bacterial or yeast overgrowth. To troubleshoot and eliminate strong odors, try adjusting feeding ratios, refreshing with fresh flour, or discarding and starting a new culture.
Can I Use the Revived Sourdough Starter Immediately for Baking or Should I Wait for a Certain Period of Time?
You can use the revived sourdough starter immediately for baking. There is no waiting period required. Once it is revived and active, it is ready to be used to create delicious sourdough bread. Enjoy!
Conclusion
In conclusion, reviving a dried sourdough starter is a simple process that involves:
- Rehydrating the dried starter
- Feeding it with fresh flour and water
- Maintaining a regular feeding schedule
By monitoring the starter’s activity and growth and troubleshooting any issues that may arise, you can gradually increase its volume and start using it for baking.
Following these steps will ensure the successful revival of your dried sourdough starter.