Are you ready to embark on the delicious journey of creating your very own sourdough starter?
Just like planting a seed and nurturing it into a flourishing plant, starting a sourdough starter takes time and patience.
Think of it as cultivating a community of wild yeast and bacteria that will transform your humble ingredients into a tangy and flavorful bread.
In just a few days, you’ll be able to experience the joy of baking with your very own homemade sourdough starter.
So, gather your flour, water, and a dash of determination, and let’s dive into the process of creating a sourdough starter that will bring you a sense of belonging in the world of bread-making.
Key Takeaways
- The process of starting a sourdough starter takes approximately 6-7 days.
- Regular feeding and maintaining the consistency of the starter is crucial for fermentation and building fermentation.
- Using high-quality, unbleached flour and filtered or bottled water is recommended for the best results.
- Experimenting with sourdough starter allows for the exploration of different recipes and fermentation techniques to achieve desired flavor and texture.
Understanding the Basics
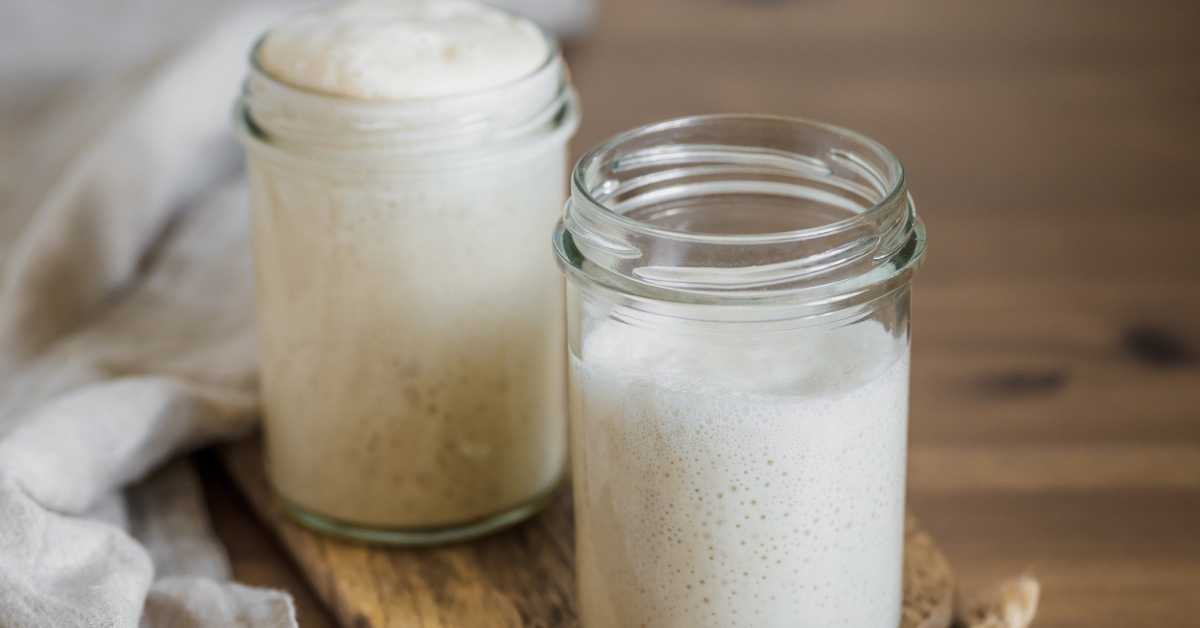
To understand the basics of starting a sourdough starter, begin with mixing flour and water. This simple step sets off a fascinating process known as fermentation, which is at the heart of sourdough bread making. The science behind sourdough lies in the interaction between the flour, water, and naturally occurring wild yeast and bacteria. As you mix the flour and water, the yeast and bacteria present in the environment begin to feed on the carbohydrates in the flour, breaking them down into simpler sugars. This process produces carbon dioxide gas, which creates the characteristic bubbles and texture in sourdough bread.
In addition to understanding the science, having the essential equipment is crucial for starting a sourdough starter. You’ll need a container, such as a glass jar or a food-grade plastic container, to hold the mixture. Make sure it has enough room for the starter to expand as it ferments. A kitchen scale is also helpful for accurately measuring the flour and water ratios. A rubber spatula or spoon is handy for stirring and mixing the ingredients. Lastly, a piece of breathable cloth, like cheesecloth or a coffee filter, and a rubber band are needed to cover the container and allow airflow while keeping out contaminants.
With these basic tools in hand, you’re ready to embark on your sourdough adventure.

Gathering Your Ingredients
Start by gathering all the ingredients you’ll need for your sourdough starter. Here are the essential items you’ll need to get started:
- Flour: Choose a high-quality, unbleached flour for best results. Whole wheat or rye flour can also be used to add flavor and complexity to your starter.
- Water: Use filtered or bottled water to avoid any chlorine or other chemicals that can hinder the fermentation process. It’s crucial to use water at room temperature to encourage the growth of beneficial bacteria and yeasts.
- Container: Select a container that’s large enough to accommodate the growth of your starter. A glass jar or a ceramic crock with a loose-fitting lid works well. Avoid using metal or plastic containers, as they can react with the acidic nature of the starter.
Now that you have gathered all the necessary ingredients, it’s time to move on to the next step in starting your sourdough starter. Remember, the consistency of your starter is essential for the fermentation process, so make sure to follow the instructions carefully to achieve the desired results.
Day 1: Mixing the Starter
Now that you have gathered all the necessary ingredients, it’s time to mix your sourdough starter on Day 1. Mixing your starter is the first step in the fermentation process, where the magic begins to happen.
To start, combine equal parts of flour and water in a clean container. You can use whole wheat or all-purpose flour, whichever you prefer. Make sure to use room temperature water, as it helps activate the natural yeasts present in the flour. Stir the mixture vigorously until it’s well combined and there are no dry flour pockets remaining. You can use a spoon or your hands for this step, whichever you find more comfortable. The mixing process helps to incorporate air into the mixture, which aids in the fermentation process.
Once mixed, cover the container loosely with a clean cloth or plastic wrap, allowing the starter to breathe. Now, you’re ready to let the fermentation process begin. Place the container in a warm spot, ideally around 70-75°F, and let it sit undisturbed for 24 hours. This will allow the natural yeasts in the flour to start feeding on the sugars and begin the fermentation process.
Day 2: Feeding the Starter
After mixing your sourdough starter on Day 1, it’s time to move onto Day 2 and feed your starter. Feeding your starter is a crucial step in the fermentation process, as it provides the yeast and bacteria with the nutrients they need to thrive and multiply.
Here are three feeding techniques to help you take care of your starter:
- Discard and feed: Start by discarding about half of your starter. This helps maintain a manageable quantity and ensures that you’re feeding a healthy culture. Then, add equal parts of flour and water to the remaining starter, stirring until well combined.
- 1:1:1 ratio: Alternatively, you can use a 1:1:1 feeding ratio. This means that for every part of starter, you add an equal weight of flour and water. For example, if you have 50 grams of starter, you’d add 50 grams of flour and 50 grams of water.
- Adjusting hydration: Depending on the consistency you desire, you can adjust the hydration of your starter by adding more or less water. A thicker starter, with less water, will result in a more dense and chewy bread, while a wetter starter will create a lighter, more open crumb.
Remember to cover your starter loosely and let it sit at room temperature for another 24 hours before feeding it again on Day 3. By following these feeding techniques, you’ll be nurturing a healthy and active sourdough starter.
Day 3-5: Building Fermentation
Continuing from Day 2, you’ll be building fermentation in your sourdough starter from Day 3-5. During this stage, the key is to create an environment conducive to the growth of beneficial bacteria and yeast. One important factor in building acidity is controlling the temperature.
To build fermentation, you’ll need to continue feeding your starter with equal amounts of flour and water every 12 hours. This regular feeding allows the beneficial microorganisms to multiply and produce lactic acid, which contributes to the sour flavor of sourdough bread.
In order to control the temperature, it’s recommended to keep your sourdough starter in a warm place, ideally between 70-80°F (21-27°C). This temperature range is optimal for the growth of the microorganisms in your starter. You can use a thermometer to monitor the temperature and make any necessary adjustments.
Building fermentation is a crucial step in developing the complex flavors and texture of your sourdough bread. The acidity produced during this stage not only enhances the taste but also helps with the overall structure and rise of the bread.
Remember to maintain a consistent feeding schedule and monitor the temperature to ensure a successful fermentation process. Building acidity and controlling temperature will set the foundation for a flavorful and well-developed sourdough starter.
Day 6-7: Maintaining and Using the Starter
To maintain and use your sourdough starter on Day 6-7, you’ll need to follow a specific set of instructions. Here’s what you need to do:
- Maintaining consistency: It’s important to maintain the consistency of your sourdough starter by feeding it regularly. Feed your starter with equal parts flour and water every 12 hours. For example, if you have 100 grams of starter, add 100 grams of flour and 100 grams of water. This will keep your starter active and ready for baking.
- Incorporating starter into recipes: Now that your sourdough starter is mature, you can start incorporating it into your recipes. You can use it to make delicious sourdough bread, pancakes, waffles, and even pizza dough. Replace a portion of the flour and water in your recipe with an equal amount of sourdough starter. This will add a tangy flavor and improve the texture of your baked goods.
- Experiment and have fun: Don’t be afraid to experiment with your sourdough starter. Try different recipes, adjust the feeding schedule, or even share some of your starter with friends and family. Sourdough baking is all about creativity, and the possibilities are endless.
Troubleshooting and Common Mistakes
If you encounter any issues or make common mistakes while maintaining your sourdough starter, here are some troubleshooting tips to help you.
Troubleshooting issues with your sourdough starter can be frustrating, but with a few simple adjustments, you can get back on track. One common mistake is using tap water that contains chlorine or other chemicals. These can inhibit the growth of the natural yeasts and bacteria in your starter. To avoid this, use filtered or bottled water.
Another issue you might encounter is a sluggish or inactive starter. This could be due to low temperatures in your kitchen. To remedy this, try placing your starter in a warmer spot, like on top of the fridge or near a warm appliance.
If your starter becomes too acidic, it can produce a strong, unpleasant smell. This can happen if you feed it too infrequently or if you use too much starter in your feedings. To avoid this, maintain a regular feeding schedule and use the correct ratio of starter to flour and water.
Frequently Asked Questions
Can I Use Whole Wheat Flour Instead of All-Purpose Flour to Make My Sourdough Starter?
You can use whole wheat flour as a substitute for all-purpose flour to make your sourdough starter. It may result in a slightly different flavor profile, but it will still work well.
How Do I Know if My Sourdough Starter Is Ready to Be Used?
To know if your sourdough starter is ready, look for bubbles, a tangy smell, and a doubling in size after feeding. If it’s not active, revive it by feeding regularly and troubleshooting common issues like temperature or hydration.
Can I Use Tap Water Instead of Filtered Water to Feed My Sourdough Starter?
You can use tap water instead of filtered water to feed your sourdough starter. However, using filtered water can help remove any impurities that may affect the fermentation process. Additionally, using whole wheat flour in your starter can provide added nutrients.
What Should I Do if My Sourdough Starter Smells off or Has Mold?
If your sourdough starter smells off or has mold, don’t panic! It’s a common issue in sourdough starter troubleshooting. To revive a dormant sourdough starter, discard any discolored or moldy parts and feed it regularly.
Can I Use a Glass Jar With a Metal Lid to Store My Sourdough Starter?
Yes, you can use a glass jar with a metal lid to store your sourdough starter. It’s important to make sure the lid is airtight to prevent any unwanted contamination.
Conclusion
In conclusion, it takes approximately 6-7 days to start a sourdough starter.
The process involves mixing the starter on Day 1, feeding it on Day 2, and building fermentation from Day 3 to 5.
Finally, on Day 6-7, the starter is maintained and ready to be used.
By following these steps and troubleshooting any issues, you can successfully create and use your own sourdough starter.