
Are you a budding sourdough baker eager to know if your bread is ready to hit the oven? Look no further! Understanding the signs that your sourdough bread is properly proofed and ready to bake is essential for achieving that perfect, crusty loaf you crave.
But how do you know when it’s time to bake? In this guide, we’ll explore the key indicators that will give you the confidence to proceed. From increased volume and a visible rise to a smooth and domed surface, we’ll cover it all.
So, grab your apron and get ready to become a master of sourdough baking. Let’s dive in!
Key Takeaways
- Increased volume and visible rise
- Smooth and domed surface
- Bubbles and air pockets
- Finger poke test
Increased Volume and Visible Rise
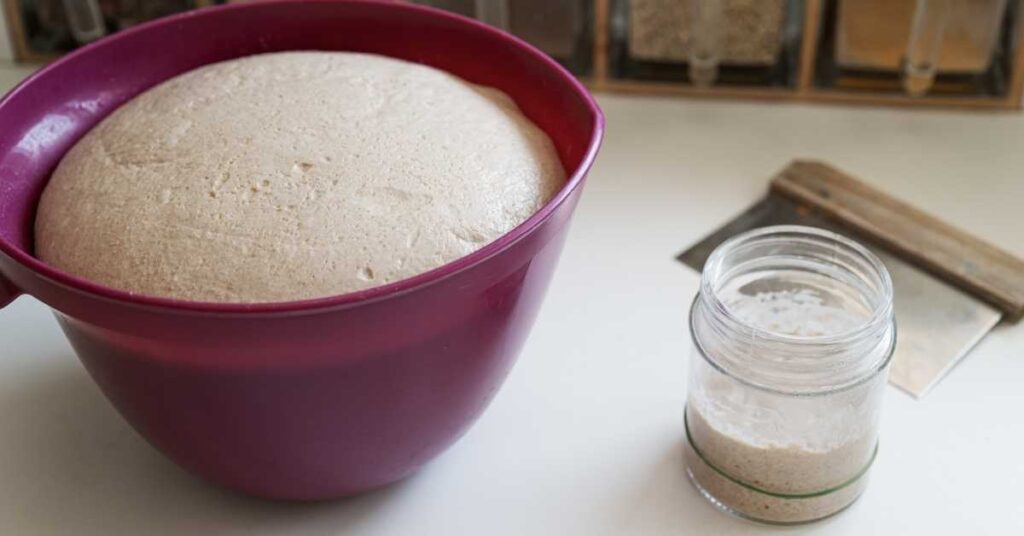
You can tell that your sourdough bread is properly proofed and ready to bake when it has noticeably increased in volume and risen visibly. The proofing process is crucial in bread-making, as it allows the dough to ferment, develop flavor, and build structure. During proofing, the yeast in the dough consumes sugars and produces carbon dioxide gas, which causes the dough to rise. This rise is a clear indication that the yeast is active and doing its job.
When your sourdough bread has properly proofed, you’ll see a significant increase in its volume. The dough will expand and fill the container it’s in, whether it’s a bowl or a bread pan. You might even notice that the dough has doubled or tripled in size. This increased volume is a result of the carbon dioxide gas being trapped within the gluten network of the dough, creating air pockets and causing the dough to rise.
Not only will the volume of the dough increase, but you’ll also observe a visible rise. The dough will look puffy and inflated, with a smooth and rounded appearance. It will no longer appear dense or flat. This visible rise is a sign that the gluten has developed properly and that the dough is ready to be baked.
Smooth and Domed Surface
Once proofed, your sourdough bread will have a surface that’s smooth and domed. This smooth and domed appearance is a clear indication that your bread has undergone proper proofing and is ready to be baked.
Here are three key reasons why a smooth and domed surface is important for your sourdough bread:
- Crust color and texture: A smooth and domed surface ensures that your bread will have an even and golden crust color. This visually appealing crust will enhance the overall appearance of your bread and make it more enticing to eat. Additionally, the smooth surface contributes to a crisp and crunchy texture, perfect for a satisfying bite.
- Tartness and flavor: The smooth and domed surface is a sign that the lactic acid bacteria in your sourdough starter have had enough time to ferment and develop the desired tartness and flavor in your bread. This fermentation process not only adds complexity to the taste, but also contributes to a more pleasant aroma.
- Belonging: Achieving a smooth and domed surface in your sourdough bread is a goal that many bakers strive for. It signifies a level of skill and expertise in the art of sourdough baking. When you share your beautifully proofed and baked bread with others, it creates a sense of belonging and connection, as you become part of the sourdough baking community.
Bubbles and Air Pockets
To determine if your sourdough bread is properly proofed and ready to bake, look for the presence of bubbles and air pockets throughout the dough. These bubbles and air pockets are a clear indication that the fermentation process has occurred successfully. During fermentation, the wild yeast present in the sourdough starter breaks down the sugars in the dough, producing carbon dioxide gas. This gas gets trapped in the dough, creating bubbles and air pockets.
The presence of bubbles and air pockets not only indicates a well-fermented dough but also signifies good gluten development. Gluten, a protein found in wheat flour, gives bread its structure and elasticity. As the dough ferments, the gluten strands strengthen and become more stretchy, allowing the dough to trap air and expand.
When observing the bubbles and air pockets, you should look for an even distribution throughout the dough. This suggests that fermentation and gluten development have occurred uniformly. Additionally, larger bubbles towards the surface of the dough indicate proper fermentation, while smaller bubbles towards the center suggest that the dough may need more time to proof.
Finger Poke Test
To determine if your sourdough bread is properly proofed and ready to bake, simply perform the finger poke test. This test allows you to assess the fermentation process and ensure that your bread has developed the right crumb structure. Here’s how to do it:
- Gently press your finger into the dough up to your second knuckle. The dough should spring back slowly, leaving a slight indentation. This indicates that it has enough structure and has been properly proofed.
- If the dough springs back quickly and fully, it’s underproofed and needs more time to ferment. Give it some extra time to rise and develop flavor.
- On the other hand, if the dough doesn’t spring back at all and the indentation remains, it’s overproofed. This means that fermentation has gone too far, leading to a dense and flat crumb structure.
By performing the finger poke test, you can ensure that your sourdough bread has been proofed to perfection. Achieving the right crumb structure is crucial for a light and airy texture that’s characteristic of a well-made sourdough loaf.
Additionally, a properly proofed bread will have a balanced taste and aroma, enhancing the overall enjoyment of your homemade creation. So go ahead and give it a poke to ensure baking success!
Slow and Controlled Dough Springback
When your finger poke into the dough results in slow and controlled springback, you can be confident that your sourdough bread is properly proofed and ready to bake. Slow and controlled dough springback refers to how the dough reacts when you press your finger into it and then release the pressure. If the dough springs back slowly and maintains its shape, it indicates that the gluten has developed well during the proofing process, giving the bread the desired consistency and elasticity.
Properly proofed dough with slow and controlled springback will result in a good crumb structure and texture in your sourdough bread. The crumb refers to the internal texture of the bread, and a well-proofed dough will have an open and airy crumb. This is achieved when the fermentation process has allowed the yeast and bacteria to produce enough gas, creating air pockets within the dough. The slow and controlled springback indicates that the dough has reached the optimal level of fermentation, resulting in a light and fluffy crumb.
Achieving slow and controlled dough springback requires careful monitoring of the proofing process. Factors such as temperature, humidity, and time all play a role in achieving the desired consistency and elasticity. By understanding and observing the signs of slow and controlled dough springback, you can ensure that your sourdough bread is properly proofed and ready to be baked, resulting in a delicious loaf with a perfect crumb structure and texture.
Frequently Asked Questions
Can I Use a Bread Machine to Proof My Sourdough Bread?
You can use a bread machine for sourdough bread proofing, but there are alternative proofing methods. A bread machine provides convenience and consistency, but other options like a warm oven or countertop fermentation can also yield great results.
How Long Should I Let My Sourdough Bread Proof in the Refrigerator?
To properly proof your sourdough bread at room temperature, let it sit for about 2-4 hours until it doubles in size. Alternatively, you can proof it in a bread basket in the refrigerator overnight.
Can I Proof My Sourdough Bread for Too Long?
If you proof your sourdough bread for too long, it can lead to overproofing consequences like a flat, dense loaf. Signs of underproofing include a lack of volume and a dense crumb.
How Do I Prevent My Sourdough Bread From Deflating During Proofing?
To prevent deflation and troubleshoot proofing issues, ensure your sourdough bread is properly proofed by checking for a doubled volume, a slightly domed top, and a finger indentation that slowly springs back.
Can I Proof My Sourdough Bread in a Warm Oven?
To proof your sourdough bread in a warm oven, you can use a proofing box or place a bowl of warm water inside the oven. These methods provide a controlled environment for optimal proofing.
Conclusion
In conclusion, when proofing sourdough bread, look for increased volume and a visible rise in the dough. The surface should be smooth and domed, with bubbles and air pockets present.
The finger poke test is a reliable indicator of readiness, as the dough should slowly spring back.
These signs ensure that your sourdough bread is properly proofed and ready to be baked, resulting in a delicious and well-risen loaf.