
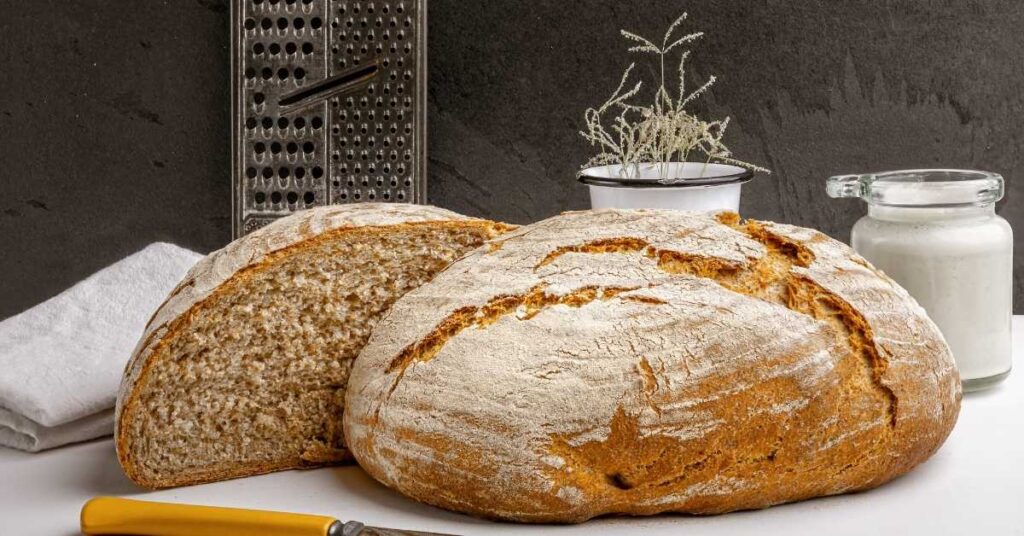
Are you yearning for that perfect, pillowy crumb in your sourdough bread? Well, worry not! Understanding what causes a tight crumb in sourdough bread can help you achieve the bread of your dreams.
A tight crumb, where the air bubbles are small and close together, can be caused by several factors. Over-fermentation, when your dough has been left to rise for too long, can result in a dense texture. Insufficient gluten development, low hydration levels, and improper shaping techniques can also contribute to a tight crumb.
Additionally, cold proofing for too long, using an old or weak starter, or incorrect baking temperature or time can all affect the final texture. By identifying and addressing these potential culprits, you’ll soon be savoring the soft, open crumb you desire.
Key Takeaways
- Factors such as over-fermentation, excessive acidity, yeast exhaustion, and inadequate gluten development can contribute to a tight crumb in sourdough bread.
- The hydration level of the dough is crucial, with low hydration leading to a dense texture and high protein flour and proper kneading techniques aiding gluten development.
- Proper shaping techniques and avoiding common mistakes such as inadequate surface tension and overhandling the dough are important for achieving an open crumb structure.
- The proofing time and temperature should be carefully adjusted to prevent excessive cold proofing and extended proofing, which can result in a tight crumb and overly sour taste respectively.
Over-fermentation
Are you wondering why your sourdough bread has a tight crumb? The answer may lie in the process of over-fermentation. Over proofing is a common issue that can lead to a dense and compact texture in your bread. When your dough is left to ferment for too long, the yeast consumes all the available sugars, resulting in excessive acidity. This acidity then weakens the gluten structure, leading to a tight crumb.
During the fermentation process, the yeast produces carbon dioxide, which creates air pockets in the dough, giving it a light and airy texture. However, if the dough is over-fermented, the yeast becomes exhausted, and the gluten structure breaks down. As a result, the dough loses its ability to trap and hold the carbon dioxide, resulting in a tight crumb.
To avoid over-fermentation and achieve a desirable texture, it’s crucial to monitor the proofing time carefully. Factors such as temperature, hydration level, and the strength of your starter can affect the fermentation process. By adjusting these variables and finding the optimal proofing time, you can ensure a well-balanced flavor and a light, open crumb in your sourdough bread.
Understanding the impact of over proofing and excessive acidity is essential in creating the perfect loaf of sourdough bread. By mastering the art of fermentation, you can satisfy your desire for belonging in the world of sourdough baking.
Insufficient Gluten Development
Insufficient gluten development can also contribute to a tight crumb in your sourdough bread. Gluten, a protein complex found in wheat flour, provides the structure and elasticity necessary for a light and airy texture. When gluten isn’t adequately developed, the bread may become dense and have a tight crumb.
To ensure proper gluten development, it’s essential to use appropriate kneading techniques. Kneading helps to align the gluten strands and develop the desired structure. Improper kneading techniques, such as under-kneading or over-kneading, can hinder gluten development and result in a tight crumb.
In addition to kneading, allowing the dough enough resting time is crucial for gluten development. During resting, the gluten strands relax and become more elastic, leading to a lighter texture. Inadequate resting time can prevent the gluten from fully developing, resulting in a tight crumb.
To avoid insufficient gluten development and achieve a light and airy crumb in your sourdough bread, make sure to use proper kneading techniques and allow the dough sufficient resting time. Remember, mastering these techniques takes practice, so don’t be discouraged if your first few loaves have a tighter crumb. With time and experience, you’ll be able to achieve the perfect texture you desire.
Low Hydration Level
To prevent a tight crumb in your sourdough bread, ensure you have enough hydration. One common cause of a tight crumb is a low hydration level, which refers to the ratio of water to flour in your dough. When the hydration level is low, the dough lacks the necessary moisture to properly develop gluten, resulting in a dense and compact texture.
To address this issue, it’s important to use high protein flour when making sourdough bread. High protein flour contains more gluten-forming proteins, which will help create a stronger and more elastic crumb. Additionally, proper kneading techniques are crucial in developing the gluten network. Kneading helps distribute the water evenly and encourages the formation of gluten strands, leading to a lighter and more open crumb structure.
When working with a low hydration level, it’s essential to pay close attention to the dough’s consistency. The dough should be soft and slightly sticky, but not overly wet. If the dough feels too dry, you can gradually add small amounts of water while kneading until you reach the desired texture.
Improper Shaping Techniques
Avoid using improper shaping techniques when making sourdough bread to prevent a tight crumb. Proper shaping is crucial for achieving an open and airy texture in your bread.
Here are some common shaping mistakes to avoid and the importance of proper dough handling:
- Inadequate surface tension: When shaping the dough, it’s important to create sufficient tension on the surface to hold the gas produced during fermentation. Failing to do so can result in a dense, tight crumb.
- Overhandling the dough: Excessive kneading or folding can cause the gluten in the dough to become overdeveloped, leading to a tight crumb. Handle the dough gently to avoid overworking it.
- Incorrect shaping technique: Using the wrong method or not following the proper shaping steps can contribute to a tight crumb. Make sure to follow a reliable shaping technique that suits your recipe.
Proper dough handling is crucial for achieving the desired texture in your sourdough bread. By avoiding common shaping mistakes and handling the dough with care, you can create a light and airy crumb that’s characteristic of well-made sourdough bread.
Remember to practice and refine your shaping skills to consistently produce excellent results.
Cold Proofing for Too Long
If you leave your sourdough bread to cold proof for too long, you may frequently end up with a tight crumb. Cold proofing, also known as retardation, is a crucial step in the sourdough bread-making process. It involves allowing the dough to ferment at a lower temperature, typically between 38°F (3°C) and 50°F (10°C), for an extended period of time. This slow fermentation helps develop the flavor and texture of the bread. However, if the dough is left to cold proof for an excessive amount of time, it can negatively impact the final result.
During cold proofing, the optimal temperature range plays a significant role. If the temperature drops too low, the yeast activity slows down, and the dough may not fully rise and develop an airy crumb. On the other hand, if the temperature is too high, the dough can overproof, leading to a collapsed structure and a dense crumb.
Extended cold proofing can also have an impact on the flavor of the sourdough bread. While a longer proofing time can enhance the flavor complexity, exceeding the optimal time frame can result in an overly sour taste. This occurs because the extended fermentation allows the production of excessive lactic acid, which can overpower the desired flavor profile.
To avoid a tight crumb, it’s important to monitor the cold proofing process and adhere to the optimal temperature range. By doing so, you can achieve a well-developed flavor and an open, airy crumb that will satisfy your taste buds and enhance your sense of belonging to the sourdough bread-making community.
Using Old or Weak Starter
When using a prolonged cold proofing method, such as retardation, for your sourdough bread, it’s crucial to be mindful of the age and strength of your starter. Using an old or weak starter can lead to a tight crumb in your bread, hindering its light and airy texture. To ensure optimal results, consider the following:
- Reviving Starter: If your starter has been neglected or stored for an extended period, it may need to be revived before use. Begin by discarding a portion of the starter and feeding it with equal parts flour and water. Allow it to ferment at room temperature for a few feedings until it becomes active and bubbly again.
- Maintaining Starter: Regularly feeding and maintaining your starter is essential for its strength and vitality. Feed your starter with fresh flour and water at least once a week, discarding a portion to prevent overgrowth. Keep it in a warm and consistent environment to promote fermentation.
- Monitoring Starter Activity: Pay attention to the signs of a healthy and active starter. Look for consistent rise and fall, a pleasant sour aroma, and a bubbly and frothy appearance. If your starter lacks vigor, consider adjusting your feeding schedule or exploring alternative methods to enhance its strength.
Incorrect Baking Temperature or Time
To achieve a light and airy texture in your sourdough bread, it’s crucial to ensure that you bake it at the optimal temperature and for the correct amount of time. The baking temperature and time play a significant role in determining the crumb texture of your bread. Baking equipment also impacts the final result.
Firstly, let’s discuss the impact of baking equipment on the crumb texture. The type of oven and baking vessel you use can affect how heat is distributed during the baking process. Different ovens may vary in temperature accuracy, hot spots, and heat circulation. Similarly, the choice of baking vessel, such as a Dutch oven or a baking stone, can influence the heat transfer and moisture retention in the dough. It’s important to understand your equipment and make adjustments accordingly to achieve the desired crumb texture.
Secondly, the role of yeast activity is crucial in achieving the desired crumb texture. Yeast activity directly impacts the fermentation process, which contributes to the development of air pockets in the dough. If the baking temperature is too high or the baking time is too long, it can hinder yeast activity, resulting in a tight crumb. On the other hand, if the temperature is too low or the baking time is too short, the yeast may not have enough time to fully ferment the dough, leading to a dense crumb.
Frequently Asked Questions
How Can I Tell if My Sourdough Bread Has Been Over-Fermented?
If your sourdough bread is over-fermented, signs include a sour taste, excessive tanginess, and a dense, tight crumb. To determine if it’s over-fermented, observe these indicators and adjust your fermentation time accordingly for optimal results.
What Are Some Signs of Insufficient Gluten Development in Sourdough Bread?
If your sourdough bread has an insufficient gluten development, you’ll notice signs like a tight crumb and a lack of air pockets. This can be caused by factors such as low protein flour or inadequate kneading.
Can Using a Low Hydration Level Result in a Tight Crumb in Sourdough Bread?
Using a low hydration level in your sourdough bread can result in a tight crumb. Higher hydration levels promote gluten development, leading to a more open and airy texture. Additionally, longer fermentation times can also contribute to a lighter crumb.
What Are Some Common Mistakes in Shaping Techniques That Can Lead to a Tight Crumb?
When shaping your sourdough bread, be mindful of common mistakes that can result in a tight crumb. Proper dough handling is crucial. Avoid overworking the dough, insufficient bench rest, and improper shaping techniques.
How Long Is Too Long for Cold Proofing Sourdough Bread?
The optimal cold proofing time for sourdough bread varies depending on factors such as ambient temperature and desired flavor development. Extended cold proofing can enhance flavor complexity, but beyond a certain point, it may lead to over-fermentation and a denser crumb.
Conclusion
To avoid a tight crumb in sourdough bread, it’s crucial to pay attention to the fermentation process, ensuring it doesn’t go beyond the recommended time.
Proper gluten development is also essential, achieved through adequate kneading or folding techniques.
Maintaining an appropriate hydration level and shaping the dough correctly contribute to a desirable crumb texture.
Cold proofing should be done within the recommended timeframe, and using a fresh, active starter is essential.
Lastly, precise baking temperature and time ensure a well-balanced sourdough bread.