
If you want to keep your small sourdough starter thriving like a flourishing garden, then this guide is for you.
Maintaining a sourdough starter is like tending to a delicate ecosystem, where every action you take contributes to its growth and vitality. With a little love and attention, you can create a strong and reliable source of tangy goodness for all your baking adventures.
In this guide, we will walk you through the essential steps to ensure your small sourdough starter stays healthy and active. From selecting the right container to adjusting feeding frequencies, we’ve got you covered.
So, let’s dive in and nurture your sourdough starter into a beloved member of your kitchen family.
Key Takeaways
- Choose a glass or food-grade plastic container for your small sourdough starter to avoid reactions and enable easy observation and cleaning.
- Maintain a consistent feeding schedule with a 1:1:1 ratio of starter, flour, and water to provide enough food for the starter and maintain a balanced environment.
- Control the temperature between 70-85°F (21-29°C) for optimal fermentation and adjust feeding frequency based on consistent rise and fall times.
- Monitor the acidity levels, observe the growth of the starter, and adjust feeding frequency accordingly to ensure a healthy and active starter.
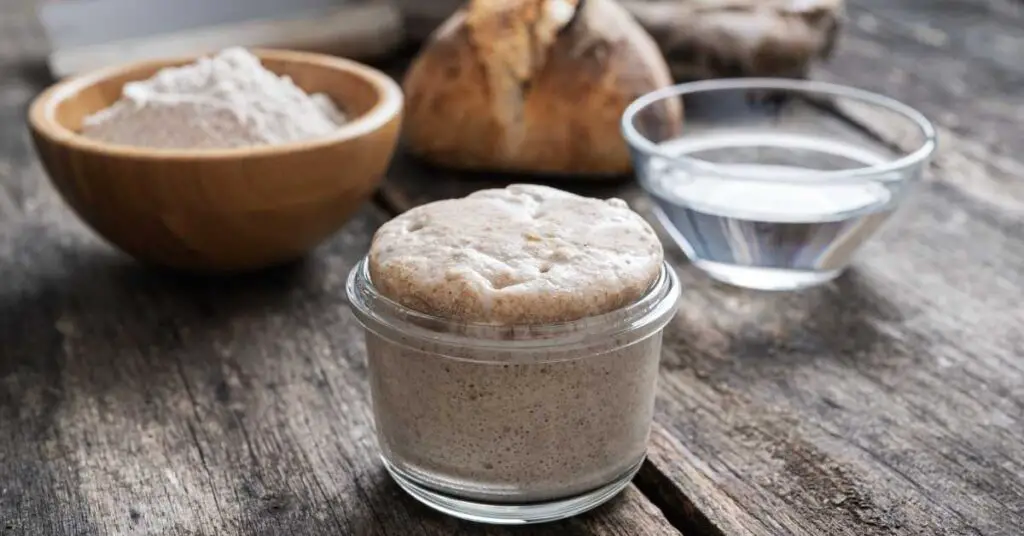
Selecting the Right Container
To maintain your small sourdough starter, you’ll need to carefully select the right container to store it in. Choosing the right size and considering the material are two key factors to ensure your starter thrives.
Let’s start with size. Your container should be spacious enough to accommodate the starter’s growth but not too big, as it may hinder its development. A container with a capacity of around 1 to 1.5 liters should be sufficient for a small starter.
Next, let’s talk about the material considerations. The ideal container for your sourdough starter is one made of glass or food-grade plastic. These materials are non-reactive, meaning they won’t interact with the acidic nature of the starter. Avoid using metal containers as they can react with the acids and compromise the quality of your starter.
Glass containers have the added advantage of being transparent, allowing you to easily observe the starter’s activity and growth. Additionally, they’re easy to clean and maintain, ensuring a hygienic environment for your starter.
Food-grade plastic containers are lightweight and durable, making them a practical choice for those who prefer portability.
Feeding Schedule and Ratios
Establishing a consistent feeding schedule and maintaining the right ratios is essential for keeping your small sourdough starter healthy and active. Feeding your starter regularly ensures that it has enough food to thrive and produce the delicious bread you desire.
When it comes to feeding techniques, there are a few different approaches you can take. One common method is the 1:1:1 ratio, which means feeding your starter with equal parts flour, water, and starter. For example, if you have 50 grams of starter, you’d add 50 grams of flour and 50 grams of water. This ratio helps maintain a balanced environment for your starter to grow and develop.
Temperature control also plays a crucial role in maintaining a healthy starter. Ideally, the temperature should be kept between 70-85°F (21-29°C). Cooler temperatures may slow down fermentation, while warmer temperatures can speed it up. Finding a consistent temperature that works for you is important for maintaining the health of your starter.
Monitoring the Starter’s Activity
To monitor your small sourdough starter’s activity, you should regularly observe signs of fermentation and growth. This will help you understand the fermentation process and ensure that your starter is healthy and active.
One way to do this is by measuring the acidity levels of your starter. Acidity is an important indicator of fermentation and can tell you if your starter is active and producing enough carbon dioxide. To measure the acidity, you can use a pH meter or pH strips that are specifically designed for sourdough starters. A pH reading between 4 and 5 is ideal for a sourdough starter.
Another way to monitor your starter’s activity is by observing its growth. A healthy starter should double in size after feeding. You can track this by marking the level of your starter before and after feeding. The rise in volume indicates that the yeast and bacteria in your starter are actively fermenting and producing gases.
Adjusting Feeding Frequency
To adjust the feeding frequency of your small sourdough starter, you should consider the activity level and health of your starter. The frequency at which you feed your starter can have a significant impact on its fermentation process. Here are some tips to help you adjust your feeding schedule and troubleshoot fermentation issues:
- Observe your starter: Pay attention to how active and bubbly your starter is after each feeding. If it consistently rises and falls within a certain time frame, you may consider adjusting the feeding frequency accordingly.
- Increase or decrease feedings: If your starter is consistently peaking and falling within 6-8 hours after feeding, you may want to increase the frequency of feedings. On the other hand, if your starter is taking longer than 12-24 hours to peak, you may want to decrease the frequency.
- Adjust the amount of food: If your starter is consistently sluggish, you can try increasing the amount of flour and water you feed it. Conversely, if your starter is consistently peaking too quickly and then falling, you can try reducing the amount of food.
- Consider temperature: The temperature of your environment can also affect the fermentation process. Warmer temperatures will speed up fermentation, while cooler temperatures will slow it down. Adjust your feeding frequency accordingly.
- Experiment and observe: Every starter is unique, so it may take some trial and error to find the perfect feeding schedule. Be patient and observe how your starter responds to different adjustments.
Maintaining Hydration Levels
To maintain the hydration levels of your small sourdough starter, you need to be mindful of the amount of water you add during feedings. It’s crucial to maintain a consistent hydration level to ensure a healthy and active starter. The hydration level refers to the ratio of flour to water in your starter. If the hydration level is too low, your starter will be stiff and dry, making it difficult for the yeast and bacteria to thrive. On the other hand, if the hydration level is too high, your starter will be runny and may not have enough structure.
To maintain the hydration levels, it’s important to understand the interaction between yeast and bacteria. Yeast prefers a wetter environment, while bacteria thrive in a drier one. By maintaining the right hydration level, you can encourage the optimal growth of both yeast and bacteria, leading to a balanced and flavorful sourdough bread.
In addition to the hydration level, maintaining temperature control is also crucial for a healthy sourdough starter. Yeast and bacteria have different temperature preferences, with yeast thriving in warmer temperatures and bacteria preferring cooler temperatures. By keeping your starter at a consistent temperature, you can promote a harmonious environment for both organisms to grow and ferment.
By being attentive to the hydration levels and maintaining temperature control, you can ensure the longevity and vitality of your small sourdough starter. With a healthy starter, you can continue to bake delicious and artisanal sourdough bread that will make you feel like a true bread-making connoisseur.
Storing the Starter
To properly store your small sourdough starter, consider the conditions that will best maintain its health and activity. Here are some options for storing your starter:
- Storing in the fridge: This is the most common method for long-term storage. Place your starter in an airtight container and keep it in the refrigerator. The cold temperature slows down fermentation, allowing you to feed your starter less frequently. Remember to take it out and feed it at least once a week to keep it alive and active.
- Storing in the pantry: If you prefer keeping your starter at room temperature, you can store it in a cool and dark pantry. However, this method requires more frequent feeding, usually every 12 to 24 hours, to keep the yeast and bacteria happy and active.
- Maintain a smaller amount: If you don’t bake as often, consider keeping a smaller amount of starter to reduce the feeding frequency. This way, you can avoid wasting excess starter and maintain a manageable amount.
- Freezing your starter: If you need to take a break from baking or want to keep a backup, you can freeze a portion of your starter. Just transfer it to a freezer-safe container and thaw it in the refrigerator when you’re ready to use it again.
- Sharing with others: Don’t forget that sharing your sourdough starter with friends and family is a great way to spread the joy of baking. Just be sure to provide clear instructions on how to care for the starter.
Troubleshooting Common Issues
If your small sourdough starter isn’t behaving as expected, troubleshooting common issues can help you identify and resolve any problems.
One common issue you might encounter is a sour smell coming from your starter. While a mild tangy aroma is normal, a strong, unpleasant odor could indicate that your starter has become over-fermented or contaminated. To fix this, try discarding a portion of your starter and feeding it with fresh flour and water. This will dilute any excess acidity and introduce new, healthy yeast and bacteria.
Another issue you may come across is mold growth on the surface of your starter. Mold can develop when the starter isn’t properly fed or stored in an unclean environment. To tackle this problem, first, discard any moldy portions of the starter. Then, thoroughly clean the container and utensils used for your starter. Lastly, feed the remaining starter with fresh flour and water, making sure to maintain a consistent feeding schedule to keep the yeast and bacteria thriving and mold at bay.
Incorporating Discard Into Recipes
You can incorporate the discard from your small sourdough starter into delicious recipes. Don’t let that precious sourdough discard go to waste! Here are some creative uses for sourdough discard that won’t only minimize waste but also add amazing flavor to your dishes:
- Pancakes: Add a cup of sourdough discard to your pancake batter for a tangy twist. The sourdough flavor will give your pancakes a unique taste that will have your family and friends asking for seconds.
- Waffles: Make your waffles extra special by incorporating sourdough discard into the batter. The discard will add depth of flavor and a subtle tanginess that will elevate your breakfast or brunch.
- Pizza dough: Use sourdough discard in your pizza dough recipe for an extra layer of flavor. The discard will enhance the taste and texture of your homemade pizza, making it truly irresistible.
- Crackers: Turn your sourdough discard into crispy, flavorful crackers. Mix the discard with herbs and spices, roll it out thin, and bake until golden brown. These homemade crackers will be a hit at any gathering.
- Pretzels: Give your pretzels a sourdough twist by adding discard to the dough. The discard will give your pretzels a unique flavor and chewy texture that will make them stand out from the crowd.
Remember, when using sourdough discard in your recipes, it’s important to maximize the flavor. To do this, make sure to use discard that’s at its peak of fermentation. The discard should be bubbly and have a slightly sour smell.
Frequently Asked Questions
Can I Use a Metal Container to Store My Sourdough Starter?
You can use a metal container for your sourdough starter, but there are pros and cons. Metal may react with the acidic nature of the starter, affecting flavor. Alternatives like glass or food-grade plastic may be better options.
How Long Can I Go Without Feeding My Sourdough Starter?
You might be wondering how long you can go without feeding your sourdough starter. Well, it depends. If you neglect it for too long, it will go dormant, but don’t worry, reviving a dormant starter is possible. Plus, maintaining a small starter has its benefits!
How Can I Tell if My Sourdough Starter Has Gone Bad?
To avoid a spoiled sourdough starter, keep an eye out for signs like gray or pink discoloration, foul odors, or mold growth. Maintain it by regular feedings, using filtered water, and storing it in a clean container.
Can I Use Tap Water to Feed My Sourdough Starter?
You can use tap water to feed your sourdough starter, but using filtered water is recommended for better results. If you’re looking for alternatives, you could try using bottled water or even distilled water.
How Do I Revive a Sourdough Starter That Has Been Neglected for a Long Time?
To revive a neglected sourdough starter, there are a few troubleshooting steps you can follow. Start by discarding most of the starter, then feed it with equal parts flour and water. Give it time, love, and attention, and it’ll perk right up!
Conclusion
So there you have it, the key steps to maintaining a small sourdough starter.
- Select the right container.
- Follow a feeding schedule.
- Monitor activity.
- Adjust feeding frequency.
- Maintain hydration levels.
- Properly store the starter.
By following these steps, you can ensure the longevity and vitality of your sourdough starter.
Don’t forget to troubleshoot any issues that may arise and incorporate your discard into delicious recipes.
With a little care and attention, your small sourdough starter will continue to thrive and provide you with endless batches of homemade bread.