Looking to embark on a delightful journey into the world of sourdough baking? Well, my friend, you’ve come to the right place! In this guide, we will share some invaluable sourdough starter tips to help you create a flourishing and flavorful dough that will have you feeling like a part of a warm and welcoming community.
From choosing the perfect flour to understanding the magical process of fermentation, we’ve got you covered. We’ll also delve into maintaining the ideal temperature, feeding your starter with love, and troubleshooting any hiccups along the way.
So, get ready to dive in and discover the secrets to creating a sourdough starter that will make you feel right at home in the world of baking. Let’s get started!
Key Takeaways
- Choose the right flour for your sourdough starter.
- Maintain the optimal temperature for fermentation.
- Monitor the activity of your sourdough starter.
- Experiment with different flours and ingredients to add variety to your sourdough bread.
Choosing the Right Flour
To ensure success with your sourdough starter, it’s essential to choose the right flour for its development. While traditional all-purpose or bread flour is commonly used, there are also alternative flours available that can add unique flavors and textures to your sourdough bread.
If you have a gluten intolerance or simply want to explore gluten-free options, there are gluten-free flours such as rice flour, almond flour, or even chickpea flour that can be used to create a delicious gluten-free sourdough starter.
When choosing an alternative flour, it’s important to consider its protein content. Gluten, a protein found in wheat flour, is what gives bread its structure and elasticity. Without gluten, it can be challenging to achieve the same level of rise and texture in your sourdough bread. However, alternative flours can still produce a satisfactory result if their protein content is similar to that of traditional flours.
Experimenting with different alternative flours can lead to exciting discoveries in the world of sourdough baking. Each flour brings its own unique flavor profile and texture, allowing you to create breads that cater to your personal preferences. So, don’t be afraid to step outside the realm of traditional flours and explore the vast array of alternative flours available. Your sourdough bread will thank you for it.
Understanding the Fermentation Process
To truly understand the fermentation process of your sourdough starter, you must dive deeper into the science behind it. Fermentation is the magical transformation that occurs when yeast activates and begins to feed on the sugars in the dough. As they consume the sugars, they release carbon dioxide gas, which creates the bubbles that give sourdough its airy texture. This process also produces alcohol and acids, which contribute to the unique flavor development of sourdough bread.
Yeast activation is a crucial step in the fermentation process. When you add water to your sourdough starter, it rehydrates the dormant yeast, waking them up and preparing them for their important role. The yeast then begins to multiply and feed on the carbohydrates present in the flour, releasing carbon dioxide and other byproducts.
Flavor development is another fascinating aspect of sourdough fermentation. As the yeast and bacteria in the starter break down the complex carbohydrates, they produce organic acids and other flavor compounds. These compounds give sourdough its tangy, complex flavor profile that’s beloved by bread enthusiasts around the world.
Understanding the fermentation process won’t only help you create delicious sourdough bread but also deepen your appreciation for the art of breadmaking. So, embrace the science behind it, experiment with different fermentation times, and enjoy the incredible flavors that can be achieved through this transformative process.
Maintaining the Optimal Temperature
Maintain the optimal temperature of your sourdough starter using a thermometer and a warm location for best results. Consistency is key when it comes to fermenting your sourdough starter, and maintaining a consistent warmth is essential for its success. As you know, the temperature plays a vital role in the fermentation process, influencing the rate at which the wild yeasts and bacteria in your starter grow and develop.
To maintain consistent warmth, consider using a proofing box. A proofing box is a handy tool that allows you to control the temperature and humidity of your sourdough starter environment. It creates a cozy and stable environment for your starter to thrive. Simply set the desired temperature, usually around 75°F (24°C), and let the proofing box work its magic.
If you don’t have a proofing box, don’t worry! You can still maintain the optimal temperature by finding a warm location in your home. Look for areas that are naturally warmer, like on top of the refrigerator or near a window. You can also use a heating pad on low or place your starter near a warm appliance. Just remember to monitor the temperature regularly with a thermometer to ensure it stays within the recommended range.
Feeding Your Sourdough Starter
Keep nourishing your sourdough starter regularly to maintain its health and activity. Feeding your sourdough starter is crucial for its growth and development. Here are some tips to help you with this important step:
- Stick to a Schedule: Creating a sourdough starter schedule will ensure that you don’t forget to feed it. Consistency is key in maintaining a healthy and active starter.
- Use Alternative Feeding Methods: While most recipes suggest discarding a portion of your starter before feeding, you can also try alternative feeding methods. For example, instead of discarding, you can use the excess starter to make delicious pancakes or flatbreads.
- Maintain the Right Ratio: When feeding your sourdough starter, ensure that you maintain the right ratio of flour to water. This ratio can vary depending on the recipe, but a common ratio is equal parts of flour and water.
- Observe and Adjust: Pay attention to how your sourdough starter reacts after feeding. Look for signs of activity, such as bubbles and a pleasant sour smell. If your starter isn’t showing any signs of growth, you may need to adjust the feeding ratio or frequency.
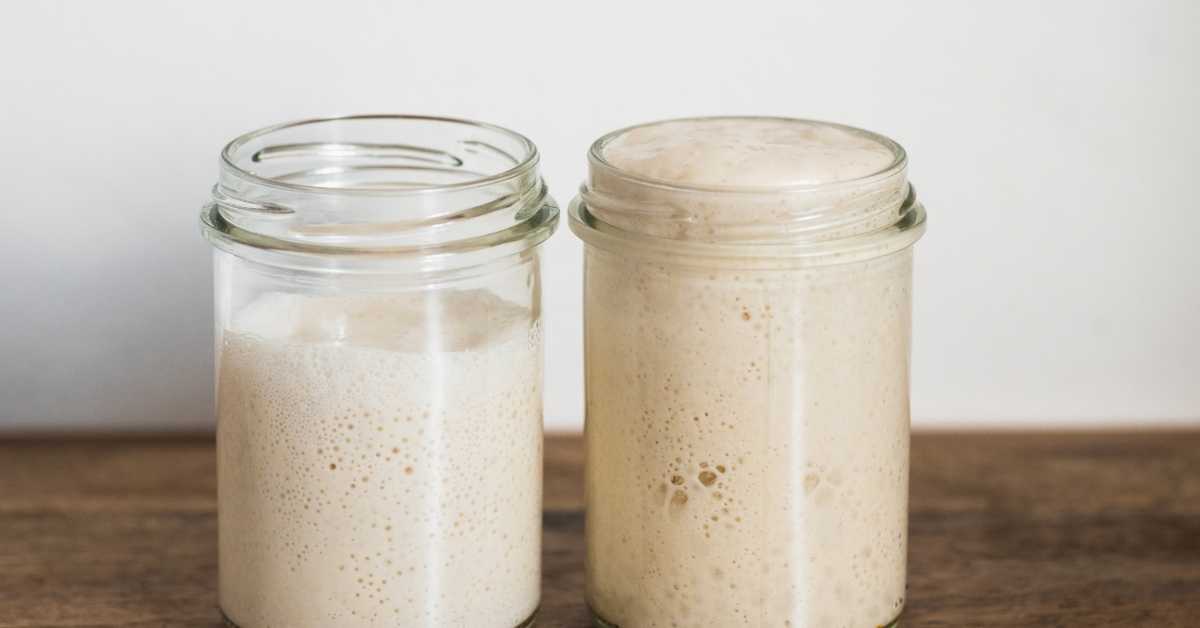
Monitoring the Starter’s Activity
Observe your sourdough starter’s activity to ensure its health and progress. Monitoring the activity of your starter is crucial in maintaining a thriving and productive sourdough culture.
Two essential aspects to monitor are the acidity levels and hydration levels of your starter.
Measuring acidity levels is important because it indicates the fermentation process and the overall health of your starter. To measure acidity, you can perform a simple float test. Take a teaspoon of your starter and drop it into a glass of water. If it floats, it means the acidity levels are balanced, and your starter is ready for baking. However, if it sinks, it indicates that the acidity levels are low, and you may need to discard some of the starter and feed it more frequently.
Adjusting hydration levels is also crucial to monitor as it affects the overall consistency and activity of your starter. Hydration refers to the ratio of flour to water in your starter. A high hydration level gives you a more liquid-like starter, while a low hydration level creates a stiffer one. By adjusting the hydration levels, you can control the activity and texture of your starter, allowing you to achieve the desired results in your sourdough baking.
Monitoring these factors will help you maintain a healthy and thriving sourdough starter, ensuring consistent and delicious bread every time you bake. So, keep a close eye on your starter’s activity, and you’ll be on your way to becoming a sourdough master.
Troubleshooting Common Issues
To ensure the health and progress of your sourdough starter, it’s important to address and troubleshoot common issues that may arise. Here are some common problems you might encounter and some troubleshooting techniques to help you overcome them:
- Slow or no fermentation: If your starter isn’t showing any signs of fermentation or is fermenting very slowly, it might be due to low temperatures. Try moving your starter to a warmer location or use a proofing box to provide consistent warmth.
- Foul odor: If your starter has a strong, unpleasant smell, it could be a sign of bacterial contamination. Discard a portion of your starter and feed it with fresh flour and water. Repeat this process daily until the smell dissipates.
- Thin consistency: If your starter is too runny and lacks structure, it may need more frequent feedings. Increase the feeding frequency to twice a day, and adjust the flour-to-water ratio to achieve a thicker consistency.
- Mold growth: If you notice mold growing on the surface of your starter, it’s best to discard it and start anew. Mold can be harmful and difficult to eradicate completely.
By identifying and addressing these common problems with the appropriate troubleshooting techniques, you can ensure that your sourdough starter stays healthy and continues to thrive.
Incorporating Different Flours and Ingredients
Experimenting with various flours and ingredients can add a unique flavor and texture to your sourdough starter. By incorporating different types of flours, such as rye, whole wheat, or spelt, you can create a more complex and interesting flavor profile. Each flour brings its own distinct taste and nutritional benefits to the starter, making it a versatile base for your bread.
Mixing techniques also play a crucial role in enhancing the flavor variations of your sourdough starter. You can experiment with different methods such as autolyse or stretch and fold to develop a stronger gluten structure, resulting in a chewier texture and more pronounced flavors.
In addition to flours, you can explore adding various ingredients to your sourdough starter. For example, incorporating seeds like sunflower, pumpkin, or flax can add a delightful crunch and nuttiness to your bread. You can also try adding herbs, spices, or even dried fruits for a unique twist.
Remember, the key to incorporating different flours and ingredients is to start small and gradually increase the amounts. This will allow you to gauge the impact on the flavor and texture of your sourdough starter and make adjustments as needed.
Storing and Reviving Your Sourdough Starter
When storing and reviving your sourdough starter, it’s important to follow proper guidelines for maintaining its freshness and viability. Here are some storing techniques and reviving methods to keep your sourdough starter healthy and active:
- Refrigerate your sourdough starter: To slow down fermentation and preserve the freshness of your starter, store it in the refrigerator. Keep it in an airtight container, like a glass jar with a loose-fitting lid, and feed it once a week to maintain its vitality.
- Freeze your sourdough starter: If you won’t be using your sourdough starter for an extended period, freezing it’s a great option. Divide your starter into small portions, place them in freezer-safe bags, and freeze. When you’re ready to use it again, thaw the portion you need and follow the reviving method.
- Reviving a refrigerated starter: To revive a refrigerated sourdough starter, take it out of the refrigerator and let it come to room temperature. Then, discard most of the starter, leaving only a small amount. Feed it with equal parts flour and water, and let it sit at room temperature until it becomes active again.
- Reviving a frozen starter: Thaw the frozen sourdough starter in the refrigerator overnight. Once thawed, discard most of the starter and feed it with fresh flour and water. Allow it to sit at room temperature until it regains its activity.
Frequently Asked Questions
Can I Use Gluten-Free Flour to Make a Sourdough Starter?
Yes, you can definitely use gluten-free flour to make a sourdough starter. It’s a great alternative for those with gluten sensitivities. However, keep in mind that troubleshooting common issues might be slightly different with gluten-free flours.
How Often Should I Feed My Sourdough Starter?
To keep your sourdough starter healthy and active, feed it regularly. The feeding frequency depends on factors like room temperature and your desired fermentation speed. Consistent starter maintenance ensures delicious, tangy loaves.
Can I Use Tap Water to Feed My Sourdough Starter?
Sure, you can use tap water to feed your sourdough starter, but using filtered or bottled water is better. It helps prevent any unwanted chemicals or impurities from affecting the fermentation process, leading to a healthier and tastier sourdough bread.
How Long Does It Take for a Sourdough Starter to Become Active?
It usually takes about 5-7 days for a sourdough starter to become active. The best temperature for fermentation is around 70-75 degrees Fahrenheit. Troubleshooting can be done if it takes longer or doesn’t show any signs of activity.
Can I Use Whole Wheat Flour Instead of All-Purpose Flour to Make a Sourdough Starter?
You can definitely use whole wheat flour instead of all-purpose flour to make a sourdough starter. Whole wheat flour adds a nutty flavor and extra nutrients to your starter, making it even more delicious and nutritious.
Conclusion
So there you have it, some sourdough starter tips to help you on your bread-making journey.
Remember to:
- Choose the right flour
- Understand the fermentation process
- Maintain the optimal temperature
- Feed your starter regularly
Keep an eye on its activity and troubleshoot any issues that arise.
Don’t be afraid to experiment with different flours and ingredients to create unique flavors.
And finally, store your starter properly and revive it when needed.