
Do you want to join the growing community of sourdough enthusiasts? Well, did you know that sourdough starters have been used for thousands of years? It’s true!
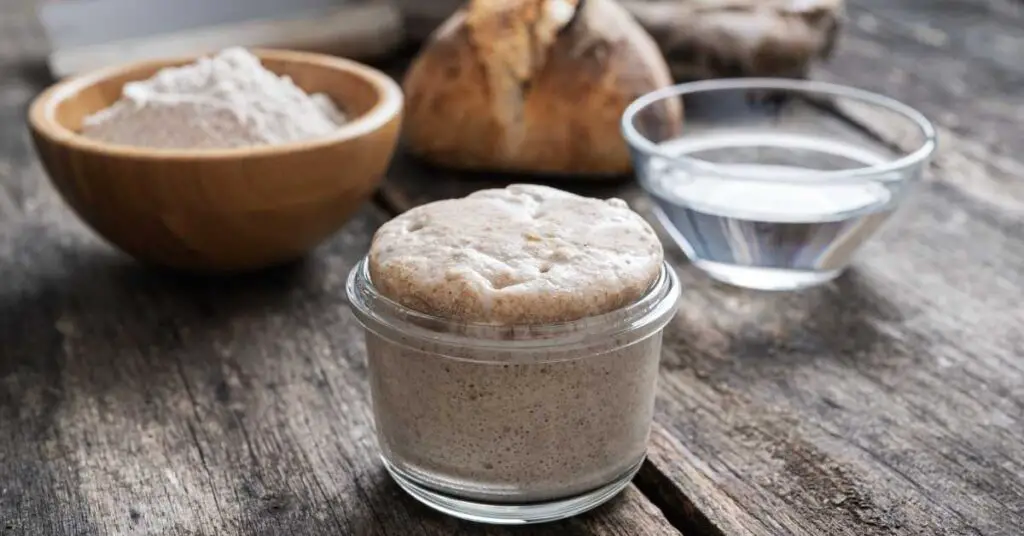
Starting your own sourdough starter is a rewarding and delicious journey that requires just a few simple ingredients. To embark on this adventure, you’ll need flour, water, salt, and natural yeast. Don’t forget a glass jar, a kitchen scale, and a clean cloth or plastic wrap to cover your starter.
With a little patience, you’ll soon have a thriving sourdough starter that will bring warmth and a sense of belonging to your kitchen. So, let’s gather these ingredients and start creating mouthwatering sourdough bread together!
Key Takeaways
- Flour, water, salt, and natural yeast are the essential ingredients for starting a sourdough starter.
- Using a kitchen scale is important for precise measurements and consistent results in sourdough baking.
- Choosing between a clean cloth or plastic wrap as a cover for the starter provides different benefits.
- Patience is necessary for waiting for the development of a well-flavored and robust sourdough starter.
Flour
To begin your sourdough starter, you’ll need to mix together flour with water. But what type of flour should you use? Different types of flour can give your sourdough starter unique characteristics and flavors.
Bread flour, with its high protein content, is a popular choice as it provides structure and strength to your starter. All-purpose flour, on the other hand, is versatile and can be easily found in most households. Whole wheat flour adds a nutty flavor and a chewy texture to your starter, making it a great option for those who prefer a heartier taste.
Experimenting with different flours can be a fun way to personalize your sourdough starter and create a bread that suits your taste preferences.
Once you’ve decided on the type of flour, it’s important to maintain a healthy sourdough starter. Regular feeding is key to keeping your starter active and thriving. Feed your starter with equal parts flour and water, and discard a portion of the original mixture to prevent it from becoming too large. This process helps refresh the natural yeast and bacteria present in the starter, ensuring a strong fermentation process.
Maintaining a consistent feeding schedule and storing your starter in a warm environment will encourage the growth of the beneficial microorganisms. Remember, a healthy sourdough starter is the foundation for delicious and flavorful bread. So, don’t forget to give it the love and attention it deserves.
Water
To properly mix the flour and create a thriving sourdough starter, you’ll need to add water to the mixture. Water plays a crucial role in the fermentation process of sourdough. The quality of water you use can greatly impact the health and flavor of your starter.
When it comes to water quality, it’s important to use filtered or spring water. Tap water can contain chlorine or other chemicals that could inhibit the growth of the beneficial bacteria and yeasts in your starter. These microorganisms are responsible for the fermentation process, which gives sourdough its unique taste and texture.
Maintaining the hydration level of your sourdough starter is also essential. The hydration level refers to the ratio of water to flour in your mixture. Different methods can be used to achieve the desired hydration level, such as the ‘100% hydration’ method, where equal parts of water and flour are used. This results in a runny batter-like consistency.
Alternatively, you can opt for a stiffer consistency by using less water. This method, known as ‘50% hydration,’ is often used for more robust and less liquid starters.
Salt
To enhance the flavor and add necessary minerals to your sourdough starter, you’ll need to incorporate salt into the mixture. Salt plays a crucial role in the fermentation process, bringing out the natural flavors of the bread and improving its texture.
Here are three key points to consider when using salt in your sourdough starter:
- Benefits of using salt in sourdough starters:
Salt not only enhances the taste of your sourdough bread but also helps to regulate the fermentation process. It helps to control the activity of the wild yeast and bacteria present in the starter, preventing it from becoming too acidic. Salt also strengthens the gluten structure, resulting in a better rise and a lighter, more airy crumb. - Different types of salt to use in sourdough starters:
There are various types of salt you can use in your sourdough starter, including sea salt, kosher salt, and Himalayan pink salt. Each type has its own unique flavor profile and mineral content. It’s recommended to use non-iodized salt, as iodine can inhibit the growth of yeast. - How much salt to use:
The amount of salt to use in your sourdough starter depends on personal preference and the recipe you’re following. As a general rule of thumb, a ratio of 1-2% salt to the weight of flour is commonly used. Start with a smaller amount and adjust according to taste.
Incorporating salt into your sourdough starter not only adds flavor but also helps in creating a well-balanced and delicious loaf of bread. Experiment with different types of salt to find the one that suits your taste buds best, and enjoy the wonderful world of sourdough baking.
Natural Yeast
Incorporate natural yeast into your sourdough starter to cultivate the fermentation process and develop complex flavors in your bread. Using natural yeast in sourdough baking has a multitude of benefits. Firstly, natural yeast adds a unique depth of flavor to your bread, resulting in a more complex and satisfying taste. It also enhances the nutritional value of the bread, as natural yeast contains beneficial bacteria and enzymes that aid in digestion.
Creating a homemade natural yeast starter from scratch is surprisingly simple. All you need is flour and water. To begin, mix equal parts flour and water in a jar and let it sit at room temperature, loosely covered with a cloth. Over time, the mixture will attract wild yeast and bacteria from the air, which will begin to ferment the mixture.
To maintain and feed your natural yeast starter, discard half of the mixture and add fresh flour and water every day or every few days. This helps to keep the yeast active and healthy. As the natural yeast starter matures, it will develop a pleasant, tangy aroma and become more reliable for baking.
Incorporating natural yeast into your sourdough starter not only enhances the flavor and nutritional value of your bread but also allows you to be part of the rich tradition of sourdough baking. So go ahead, start your own natural yeast journey and enjoy the wonderful world of homemade sourdough bread.
Glass Jar
You will need a 1-quart glass jar for your sourdough starter. It’s important to choose the right type of glass jar to ensure the success of your starter. Here are three things to consider when selecting a glass jar for your sourdough starter:
- Size: Make sure the jar is at least 1 quart in capacity to allow room for the starter to grow. A larger jar is better because when the starter is active, it will expand and rise.
- Material: Opt for a glass jar instead of plastic or metal. Glass is non-reactive, which means it won’t interact with the acidic nature of the sourdough starter. This helps maintain the integrity of the starter and prevents any unwanted flavors.
- Closure: Look for a jar with an airtight lid or a lid that can be loosely closed. This will help create a stable environment for the starter, keeping out contaminants while still allowing some airflow.
To maintain a healthy sourdough starter in a glass jar, here are some tips:
- Keep the jar clean by washing it with warm soapy water before each feeding.
- Store the jar in a warm spot, away from direct sunlight.
- Stir the starter daily to prevent any hooch (a layer of liquid) from forming on top.
- Feed the starter regularly, discarding part of it before each feeding to keep it fresh and active.
With the right glass jar and proper care, your sourdough starter will thrive and provide you with delicious homemade bread.
Kitchen Scale
What is the importance of using a kitchen scale when starting a sourdough starter?
Well, if you want to bake the perfect loaf of sourdough bread, using a kitchen scale is essential. When it comes to baking, precision is key, and a kitchen scale allows you to accurately measure your ingredients.
Using a kitchen scale for baking helps you achieve consistent results every time. Unlike measuring cups, which can vary in size and accuracy, a kitchen scale gives you precise measurements in grams or ounces. This is especially important when it comes to the flour and water ratio in your sourdough starter.
Maintaining a healthy sourdough starter requires feeding it with the right amount of flour and water. A kitchen scale ensures that you maintain the proper hydration level, which is crucial for the fermentation process. Too much or too little flour can throw off the balance and result in a weak or overly sour starter.
Clean Cloth or Plastic Wrap
To properly cover your sourdough starter, use a clean cloth or plastic wrap. This step is crucial in creating the perfect environment for your starter to develop and ferment.
Here are some things to consider when choosing between a clean cloth or plastic wrap:
- Benefits of using a clean cloth:
- A clean cloth allows the starter to breathe while protecting it from dust and other contaminants.
- The cloth helps maintain a consistent level of moisture, which is essential for the fermentation process.
- Using a cloth gives your starter a rustic and traditional feel, connecting you to the long history of sourdough baking.
- Benefits of using plastic wrap:
- Plastic wrap creates an airtight seal, preventing any air from entering or escaping the container.
- It provides a barrier against potential fruit fly infestations, ensuring the cleanliness of your starter.
- Plastic wrap is convenient and easy to use, allowing you to quickly cover and uncover your starter as needed.
- Alternatives to using a clean cloth or plastic wrap:
- If you don’t have a clean cloth or plastic wrap available, you can use a clean plate or a tight-fitting lid to cover your starter.
- Some bakers prefer using a shower cap as it provides a snug fit and keeps the starter well-protected.
- Be creative and resourceful by exploring other options in your kitchen that can serve as a cover, as long as they’re clean and can maintain the necessary conditions for your starter.
Patience
Exercise patience as you wait for your sourdough starter to develop and ferment. Starting a sourdough starter is an exciting journey, but it requires time and patience. It can be tempting to rush the process, but remember that good things come to those who wait. Here are some tips for staying patient while waiting for your sourdough starter to develop.
Firstly, remind yourself of the benefits of patience. A well-developed sourdough starter will result in a more flavorful and robust bread. Take this time to appreciate the natural fermentation process and the unique flavors it can bring to your baking.
Secondly, find ways to occupy yourself during the waiting period. Use this time to research different sourdough recipes, experiment with other types of bread, or try out new baking techniques. By focusing on other aspects of baking, you can divert your attention from the waiting process.
Additionally, keep a journal to document your sourdough starter’s progress. This will help you track its growth and transformation over time. It can be incredibly rewarding to look back on your notes and see how far your starter has come.
Lastly, remember that patience is key to achieving the best results. Rushing the process may lead to disappointment and a less flavorful bread. Embrace the waiting period as an opportunity for personal growth and learning.
Frequently Asked Questions
How Long Does It Take for a Sourdough Starter to Become Active and Ready for Use?
To get your sourdough starter active and ready for use, it typically takes about 5-7 days. The fermentation process is influenced by temperature, so try to control it. Look for bubbles, a tangy smell, and a doubled volume to know when it’s ready.
Can I Use Whole Wheat Flour Instead of All-Purpose Flour to Start My Sourdough Starter?
You can definitely use whole wheat flour instead of all-purpose flour to start your sourdough starter. Whole wheat flour adds a nutty flavor and extra nutrients to your bread, making it a healthy and delicious choice.
Is It Necessary to Use a Glass Jar for Creating a Sourdough Starter, or Can I Use a Different Type of Container?
You can use different types of containers to create a sourdough starter. While a glass jar is popular, you can also try using a ceramic or stainless steel container. Each has its advantages and disadvantages, so choose what works best for you.
How Often Should I Feed My Sourdough Starter During the Initial Stages of Fermentation?
During the initial stages of fermentation, you should feed your sourdough starter every 12 hours. This frequent feeding helps establish a strong and active culture. If you encounter common issues, like a sluggish starter, adjusting the feeding frequency can help troubleshoot.
Can I Use Tap Water to Feed My Sourdough Starter, or Should I Use Filtered or Bottled Water?
You can use tap water to feed your sourdough starter, but using filtered or bottled water is recommended. It helps remove chlorine and other impurities that could potentially harm the fermentation process.
Conclusion
Now that you have all the ingredients you need, it’s time to embark on your sourdough journey.
Remember, creating a sourdough starter requires patience and a little bit of TLC.
With regular feedings and a warm environment, your starter will come to life, bubbling and bursting with flavor.
So grab your kitchen scale, mix your flour and water, and get ready to experience the magic of homemade sourdough bread.